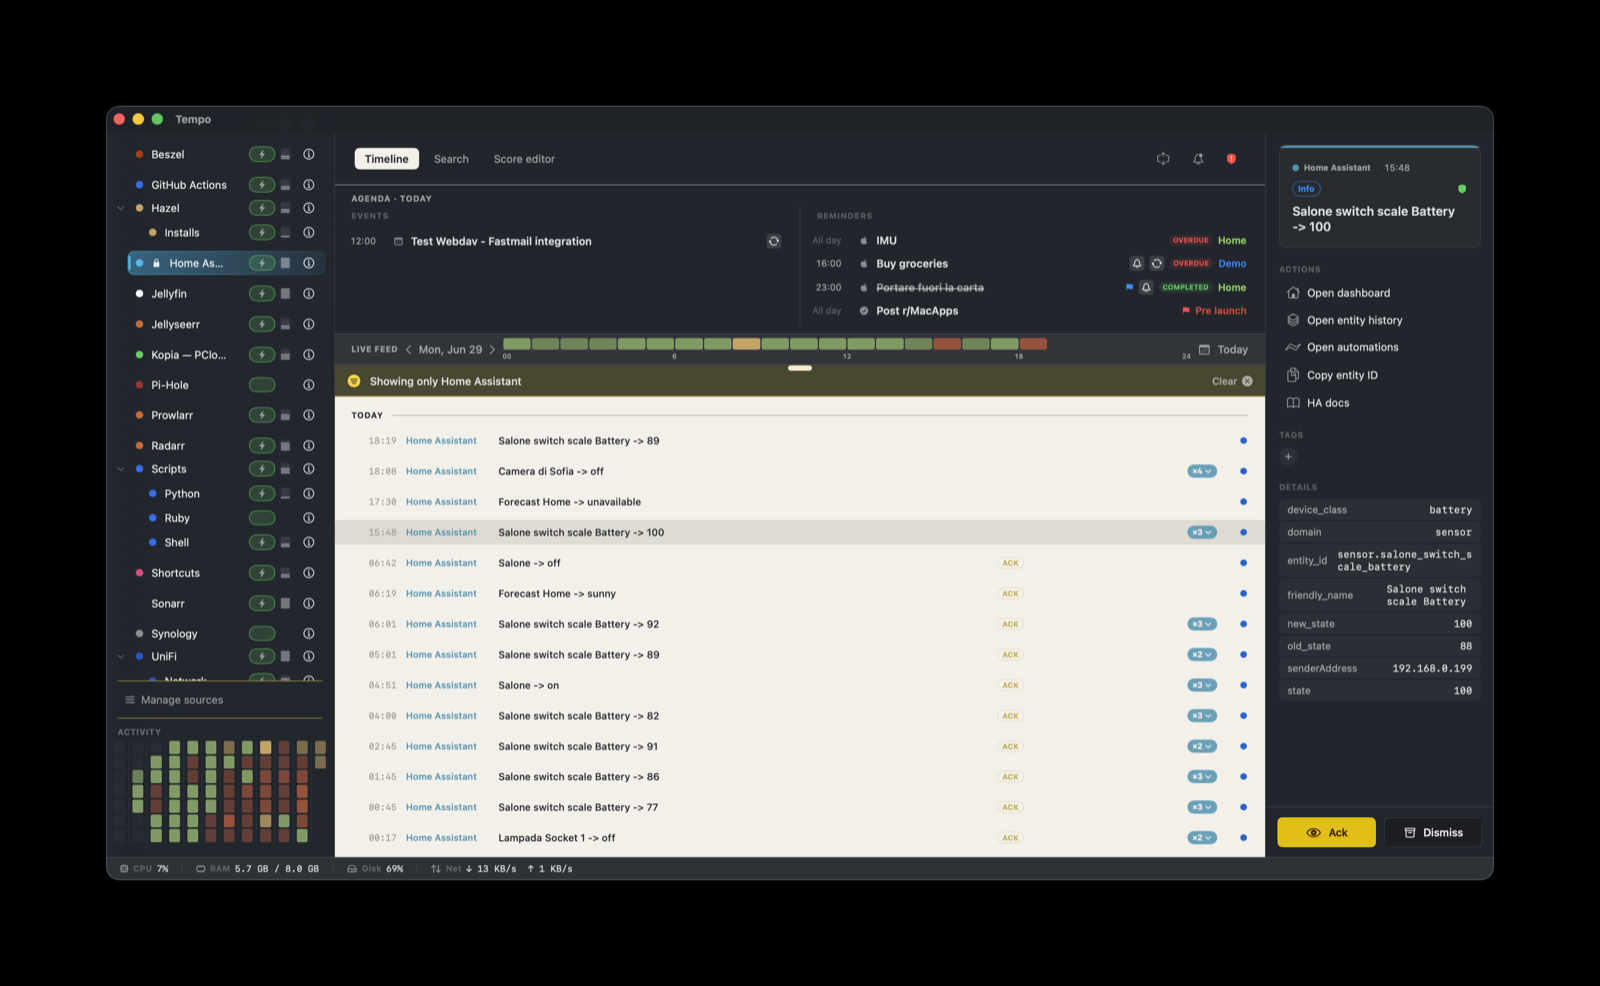
Home Assistant is a home automation platform. This score renders the state changes you choose to forward, classified by device class. Home Assistant posts to Tempo directly through a rest_command, so there is no companion helper to run. It is read-only into Tempo: the actions open the dashboard, an entity’s history, or the automation editor, and nothing writes back to Home Assistant.
How it works
Home Assistant produces a state change for almost everything in the house, far more than belongs on a timeline. Two mechanisms keep the feed useful.
First, you curate at the source. An automation forwards only the entities you tag, so the noise never leaves Home Assistant.
Second, the score classifies by device class. It reads the stable device_class attribute (smoke, moisture, lock, and similar) rather than the entity name, so severity holds up even when an integration names entities by hardware ID.
The data path is direct: a Home Assistant automation fires on a state change, calls the rest_command, and POSTs a JSON event to Tempo’s ingestion endpoint with a per-provider token. The score then assigns severity, a badge label, grouping, and the action buttons.
Curate at the source
Home Assistant decides what reaches Tempo, not the score. The cleanest control is a label.
- In Home Assistant, add a label, for example
tempo, to each entity you want on the timeline. Entity labels are under Settings → Devices & Services → Entities, or in an entity’s own settings dialog. Labels require Home Assistant 2024.4 or later. - The automation in step 3 below fires on every state change but forwards only entities that carry that label.
When the timeline fills up later, tighten the label in Home Assistant rather than editing the score. Curation belongs on the Home Assistant side.
Setup
1. Create a token
In Tempo, open Settings → Ingestion and add a token bound to com.home-assistant. Copy it.
2. Define the rest_command
Add this to configuration.yaml. The score reads the metadata keys entity_id, device_class, friendly_name, area, and state, so the payload sends those exact keys:
# configuration.yaml
rest_command:
  tempo_ingest:
    url: "http://<your-mac-ip>:7776/ingest"
    method: POST
    content_type: "application/json"
    headers:
      X-Tempo-Token: !secret tempo_token
    payload: >
      {"title": "{{ friendly_name }} is {{ state }}",
       "providerIdentifier": "com.home-assistant",
       "metadata": {
         "entity_id": "{{ entity_id }}",
         "device_class": "{{ device_class }}",
         "friendly_name": "{{ friendly_name }}",
         "area": "{{ area }}",
         "state": "{{ state }}",
         "new_state": "{{ new_state }}",
         "old_state": "{{ old_state }}"
       }}
Get the token from Settings → Ingestion. Rather than pasting it into configuration.yaml, keep it in Home Assistant’s secrets.yaml: add a line tempo_token: <token> there, and the !secret tempo_token reference above reads it from that file. This keeps the token out of the shared configuration and works on every install (Container, Supervised, OS, or Core). On a container setup you can instead pass the token as an environment variable and write X-Tempo-Token: !env_var TEMPO_TOKEN. Then reload the YAML configuration (Developer Tools → YAML → Reload, or restart Home Assistant) so the command registers.
3. Add the automation
This automation fires on any state change and forwards only labeled entities. The device_class value comes from the entity’s attributes:
alias: Tempo forward labeled entities
trigger:
  - platform: event
    event_type: state_changed
condition:
  - "{{ trigger.event.data.entity_id in label_entities('tempo') }}"
action:
  - service: rest_command.tempo_ingest
    data:
      entity_id: "{{ trigger.event.data.entity_id }}"
      device_class: "{{ state_attr(trigger.event.data.entity_id, 'device_class') }}"
      friendly_name: "{{ trigger.event.data.new_state.attributes.friendly_name }}"
      area: "{{ area_name(trigger.event.data.entity_id) }}"
      state: "{{ trigger.event.data.new_state.state }}"
      new_state: "{{ trigger.event.data.new_state.state }}"
      old_state: "{{ trigger.event.data.old_state.state }}"
Trigger a labeled entity. The event reaches Tempo’s feed within about a second.
How the score classifies events
The score matches device class first. The device_class attribute is stable, because Home Assistant assigns it from what a sensor reports rather than from how the entity is named. An integration such as Zigbee2MQTT may name a smoke detector binary_sensor.0x00158d0001abc_ias_zone, which carries no meaning, while its device_class stays smoke. Matching on the class catches both the well-named and the cryptic entity. A second set of rules matches entity_id glob patterns (*_smoke*, *_leak*, and similar) as a fallback for entities with no device class.
Rules are evaluated in order, and the first match wins:
| Severity | Triggers |
|---|---|
critical | device_class smoke, carbon_monoxide, gas, moisture, or safety, in the on state; an alarm_control_panel.* entity that becomes triggered |
warning | device_class tamper or problem (on); a low battery; alarm_control_panel.* in the pending state; Home Assistant stopping |
info | doors, windows, and motion; alarm arm and disarm transitions; locks; presence (person.* and device_tracker.*, home or away); climate changes; an available update |
ok | a safety sensor returning to off (leak cleared, smoke cleared) |
Entities with no device_class and no matching rule land at the info default. The safety styling depends on device_class and entity_id being present in the payload, which is why both are in the automation above.
Grouping and actions
Events stack per entity (entity_id) within a one-hour window, so an entity that changes state repeatedly reads as one entry rather than a row per change.
Five actions are attached to every event:
- Open dashboard: opens Home Assistant at
http://${metadata.senderAddress}:8123.senderAddressis the host that posted the event, resolved automatically, so there is nothing to hardcode. For a custom port or HTTPS, edit the action’s URL in the Score Editor. - Open entity history: opens the entity’s history page for
${metadata.entity_id}. - Open automations: opens the automation editor.
- Copy entity ID: copies
${metadata.entity_id}. - HA docs: opens the Home Assistant documentation.
Known limitations
Curation lives on the Home Assistant side: the tempo label decides what is sent, and Tempo classifies and renders only what arrives. To add or remove entities, change the label rather than the score. Other domains, including calendar events, can be forwarded the same way by sending the metadata keys the score reads.